Capturing and Deploying Images using CloneZilla
CloneZilla is the software we use to deploy the master image across the labs. This Subsection will cover all the different ways CloneZilla can be used.
However, all uses of Clonezilla start the same way which will be explained here.
Creating Clonezilla USB Stick
Before we can use Clonezilla, we have to prepare a USB stick with it installed that we can boot Clonezilla from. First, download Clonezilla from the Clonezilla website.
You'll want to choose the most up-to-date stable release.
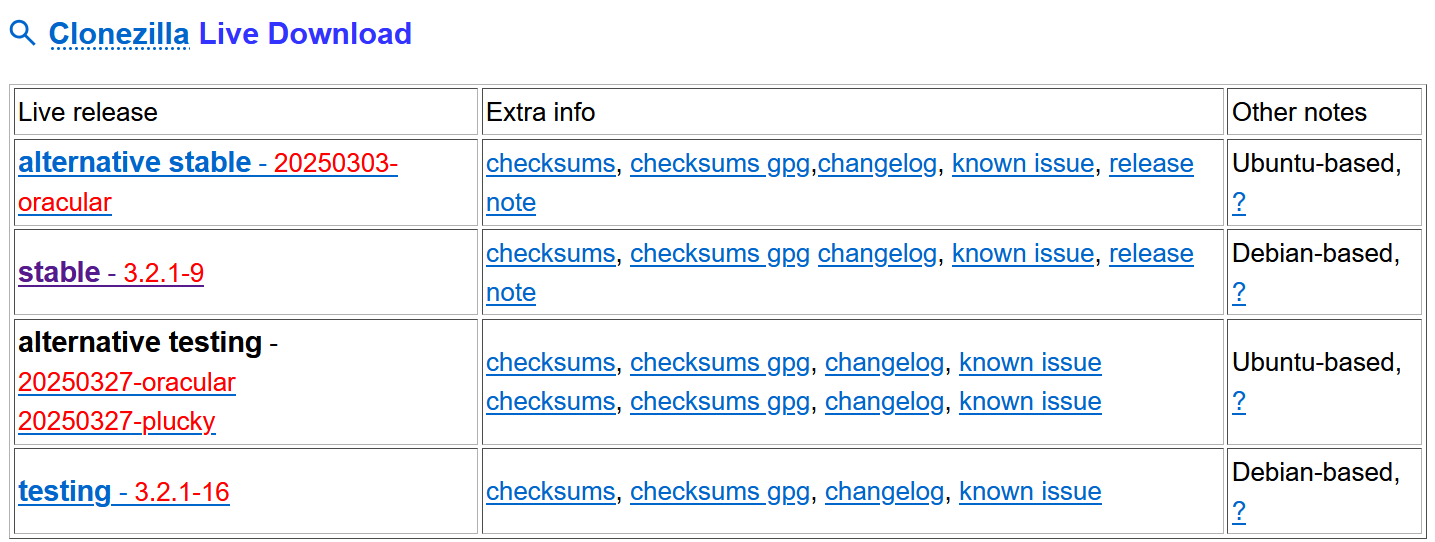
On the next screen, select file type 'iso' and press download.

Wait for it to download.
Next, you'll want to use a program that helps create bootable USB drives. One that most of the team uses is 'Rufus', which is the one I'll be explaining here. If you want to use another, there will be tutorials online for that specific one.
Download Rufus from their website, and download the latest release.
Once it's downloaded, run the exe file and go through the instructions to finish the installation.
Once the installation is finished, open it up. It'll look something like this.
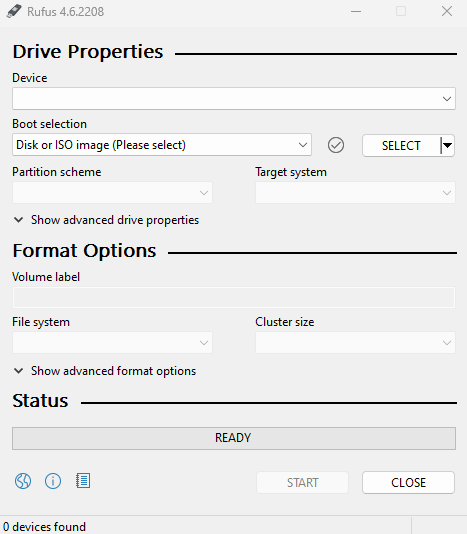
Plug in the USB you want to become your Clonezilla drive. It should appear at the top of the menu where it says 'device'.
Next, under 'boot selection' make sure 'disk or iso image' is selected from the drop-down. Then, click where it says 'select'. This will open up your file explorer. Go find your Clonezilla iso and select that. This will unlock a lot more options. For this though, we can leave them all as standard. Simple press 'start' and let it work.
Once it's done, the 'ready' will turn to 'done'. Eject your USB in the task bar or file explorer, take it out, and your bootable Clonezilla USB is ready to go!
Starting Clonezilla
All uses of Clonezilla start the same way, which I'll explain here.
Put the USB stick in the PC you want to image. As it's starting up, press the option to open the boot menu. To do this, there'll be a certain key you'll need to press as it's starting up but which key depends on the motherboard. Common keys used are F12, F11, Esc and Del. Either look up the correct key for the PCs you're using, or use trial and error.
Once you're in the boot menu, you'll want to select your USB stick to boot into. This is usually near the bottom of the list, and will say something like 'USB', 'Flash Drive' or the make of the drive like 'Sandisk' or 'Kingston'.
You will then be met with the Clonezilla boot menu (see below image). You'll want to select the second option, which says 'VGA 800x600 & To RAM'. The important part of this is that it's 'to RAM'. This means that once it's started up fully, you'll be able to take out the USB stick. This is a must when you're imaging an entire lab of PCs and saves you having to have too many drives.
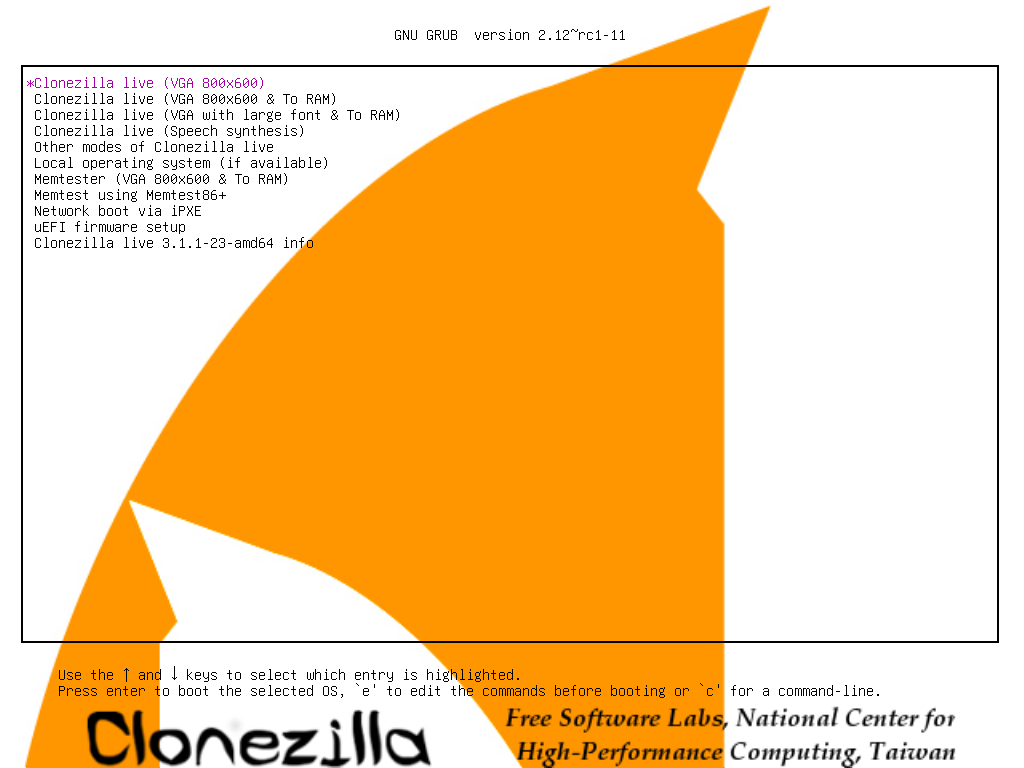
Once this is selected, wait until it starts. You'll know it's started when you're met with a grey box with blue background. It is now safe to remove the USB drive and start booting other PCs, as long as you choose the 'To RAM' option previously.
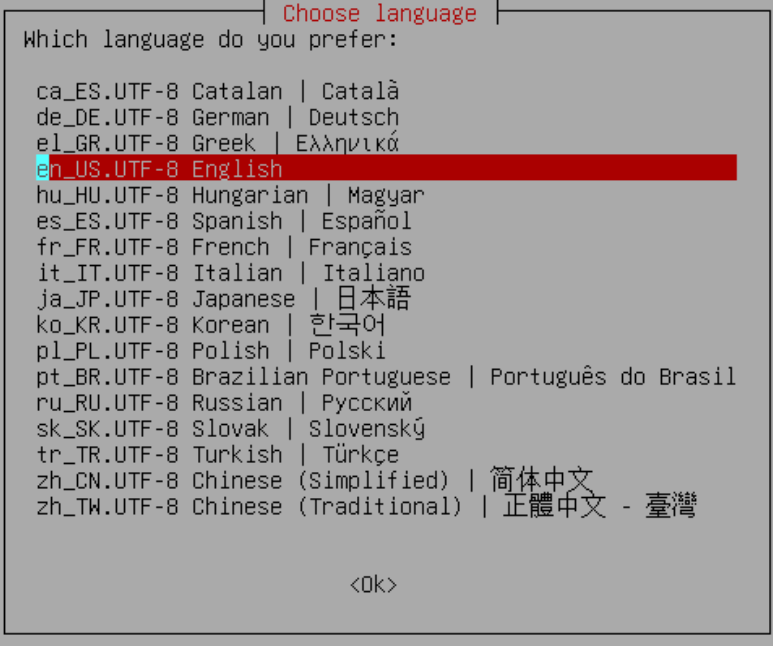
It will ask you to choose a language, so choose English. Then it will ask you to choose a keyboard layout - the default keyboard layout is fine so select that. Finally, press 'Start Clonezilla'
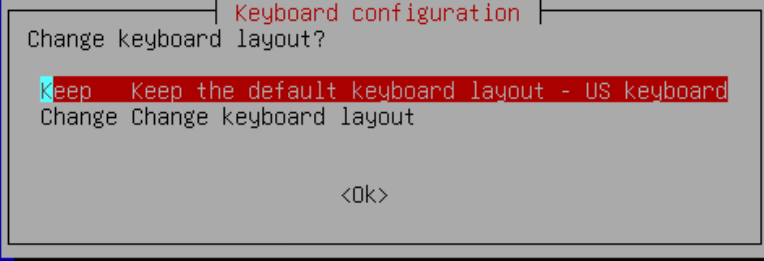
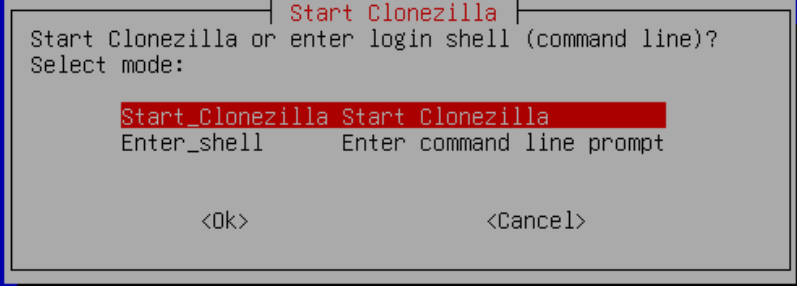
The next steps will be different depending on what kind of imaging you'll be doing, so check out the subtopics for further instructions.